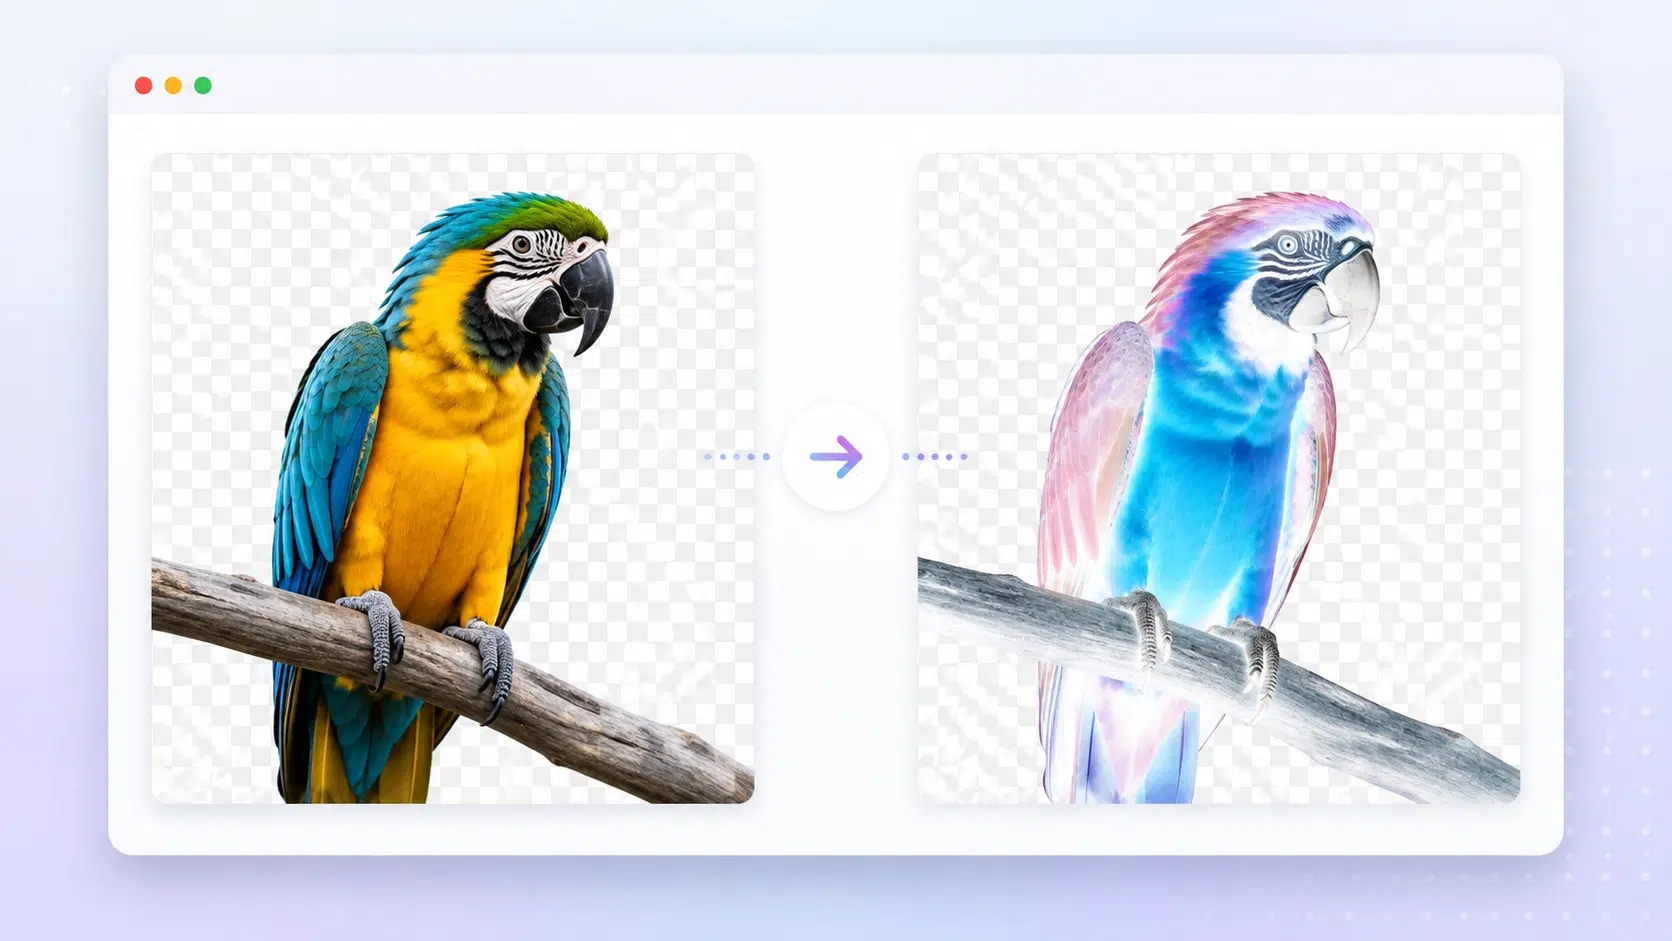
A transparent PNG can look perfect before editing and completely wrong afterward. You upload a logo, icon, illustration, or UI asset, invert its colors, and suddenly the transparent background has become a solid black or white rectangle. If you have encountered this problem, the issue is usually not the color inversion itself. It is how the image’s transparency information is handled.
This is particularly important when you want to invert PNG colors online. A PNG can contain both RGB color information and an Alpha channel that controls transparency. If an editing process changes the color channels but mishandles the Alpha channel, the visual result may no longer behave like the original transparent asset.
The good news is that correctly inverting a PNG does not require sacrificing transparency. The key is understanding what should be inverted, what should remain unchanged, and how to verify the exported file before using it in a design or development project.
Why Inverting PNG Colors Can Break a Transparent Background
PNG Has More Than RGB
A typical digital image uses three primary color channels: Red, Green, and Blue (RGB). PNG files can also contain an Alpha channel, which stores transparency information.
For an 8-bit Alpha channel, the values range from 0 to 255:
- 0 = completely transparent
- 255 = completely opaque
- Values between 0 and 255 = partially transparent
This distinction is crucial for logos, icons, stickers, illustrations, interface elements, and other assets designed to sit on top of different backgrounds.
Consider a white logo exported as a transparent PNG. The white pixels contain color information, while the empty area around the logo has an Alpha value indicating that it should not be visible. The transparency is not simply “white pixels that have been hidden.” It is separate image information.
The Common Mistake: Treating Alpha Like a Color Channel
A basic color inversion operation can be described as:
new channel value = 255 − original value
For example, an RGB value of 0 becomes 255, while 255 becomes 0. This produces the familiar effect where black becomes white and colors move toward their complementary values.
However, the same operation should not normally be applied to Alpha when the objective is to preserve the original transparency.
If an Alpha value of 0 were inverted to 255, a completely transparent pixel would become completely opaque. In practical terms, an area that was supposed to disappear could suddenly become visible.
This is one reason a technically correct PNG color inversion should treat RGB and Alpha differently.
The Correct Processing Logic
When the goal is to invert the colors while preserving transparency, the basic workflow is:
- Read the RGB values.
- Invert the RGB channels.
- Leave the Alpha values unchanged.
- Export the result while retaining transparency.
For example, a pixel with:
RGBA = (20, 100, 200, 0)
could become:
RGBA = (235, 155, 55, 0)
The RGB values have been inverted, but the Alpha value remains 0. The pixel therefore remains fully transparent.
The same principle applies to partially transparent pixels. Their RGB values can change while their original opacity remains intact.
This is the difference between simply creating a visual “negative” and properly processing a transparent PNG asset.
Method 1: Invert a PNG in Photoshop While Preserving Transparency
Photoshop provides a reliable option when you need professional editing controls and already have the software installed.
Step 1: Open the PNG and Check the Transparency
Open your PNG file in Photoshop. Look at the area around the subject.
The familiar gray-and-white checkerboard pattern indicates transparency. If you see that pattern around your logo or illustration, the file contains transparent areas.
Before making any changes, it is useful to confirm that the original transparency is actually present.
Step 2: Keep the Original Layer Structure
Select the layer containing the PNG, but avoid unnecessarily flattening or merging the document.
This matters because merging layers or placing the image against a solid background can change the way transparency is represented. If the original file contains useful Alpha information, preserving the layer structure gives you more control over the final result.
Step 3: Apply the Invert Adjustment
With the appropriate layer selected, go to:
Image → Adjustments → Invert
You can also use the keyboard shortcut:
Ctrl + I on Windows
Command + I on macOS
Photoshop reverses the image’s color values. The important point is that the transparent areas should remain transparent rather than becoming a visible color.
You can immediately check the checkerboard pattern around the image to confirm this visually.
Step 4: Export as PNG
When you are finished, export the image in a format that supports transparency.
PNG is generally the obvious choice for logos, icons, UI assets, and illustrations that need transparent backgrounds.
Common mistake: Do not convert a transparent image to JPEG when transparency is required. JPEG does not support an Alpha channel, so transparent areas must be replaced by a solid background during conversion.
The exact export options available can vary between Photoshop versions, so the important requirement is not a particular menu label but preserving transparency in the final PNG.
The Downside of the Professional Workflow
Photoshop gives you considerably more control, but that control comes with extra steps. You need the software, you need to know where the relevant adjustment is located, and you need to pay attention to the export format.
That is reasonable for a designer working on a larger project. It can feel excessive, however, when the task is simply: “I have a transparent PNG, and I want its colors reversed.”
Method 2: Invert PNG Colors Online With a Dedicated Tool
If you do not need layers, masks, curves, or detailed color grading, a dedicated browser-based tool can make the process much more direct.
Image Inverter is an online image color inversion tool that supports PNG alongside JPG, WebP, BMP, GIF, SVG, TIFF, and HEIF. It also provides batch processing, live previews, image transformations, and multiple export formats.
For someone searching specifically for a way to invert PNG colors online, the appeal is the focused workflow. Instead of opening a full image editor, you can upload the asset, apply the inversion, inspect the result, and export it.
How to Invert a PNG Online
- Open imageinverter.com in your browser.
- Upload your PNG image.
- Apply the color inversion and inspect the preview.
- Download the processed PNG if the transparency and colors look correct.
The website supports adjustable inversion intensity from 0% to 100%, so the effect does not necessarily have to be treated as an all-or-nothing transformation. It also supports multiple-image uploads and batch downloads, which can be useful when working with a collection of assets.
One additional consideration is privacy. Image Inverter states that image processing takes place locally in the browser and that uploaded images are not sent to its servers. This can be useful for users who prefer browser-based processing without transferring source images to a remote processing service.
Why This Approach Can Be More Convenient
The main advantage is not that an online inverter replaces professional image-editing software. It does not.
Rather, it removes unnecessary steps when the task is narrowly defined. If you need to invert several PNG assets and do not need layer editing, a dedicated tool can fit more naturally into a quick design or development workflow.
For example, a developer might need an inverted version of a transparent SVG or PNG icon for a dark interface. A designer might need several alternative logo treatments for a presentation. A content creator might want to experiment with a transparent illustration before deciding on the final color palette.
In these cases, speed and simplicity can matter more than advanced editing controls.
How to Verify That Your Inverted PNG Still Has Transparency
Never assume that a downloaded PNG preserved its Alpha information. A quick visual check can prevent problems later.
Check the Checkerboard Background
Open the exported PNG in Photoshop, Figma, or another design application.
If the area surrounding the image displays the familiar checkerboard pattern, those pixels are transparent rather than solid white or black.
Test It Against Different Backgrounds
Place the PNG over two or three different background colors.
If the background changes while the inverted graphic remains visible, the transparency is probably working as intended.
This is especially useful for logos and UI assets because a transparent image may look correct against white while hiding a problem that becomes obvious against a dark background.
Check the Image’s Color and Alpha Information
For developers, an additional check is to inspect the image with an image-processing application or browser-based diagnostic tool.
A PNG intended to retain transparency should contain appropriate Alpha information. In technical workflows, the distinction between an RGB image and an RGBA image can be important because the latter includes the additional transparency channel.
This matters when the asset is later placed into a website, application interface, game engine, or design system.
Frequently Asked Questions
Why did my PNG background turn black after inversion?
The editing process may have flattened the transparent area or exported the image against a solid background. Check whether the original Alpha information was preserved during processing and export.
What is the difference between inverting RGB and inverting Alpha?
RGB controls color, while Alpha controls opacity. For a normal color-inversion workflow, RGB values are reversed but Alpha values should remain unchanged so transparent areas stay transparent.
Will inverting a PNG change its file size?
It can. File size depends on factors such as image dimensions, color information, compression, metadata, and export settings. The inversion operation itself does not guarantee a particular file size.
What happens to semi-transparent pixels?
Their RGB values can be inverted while their Alpha values remain unchanged. For example, a pixel with 50% opacity should still have approximately the same opacity after its colors are inverted.
Conclusion
Inverting the colors of a PNG sounds simple, but transparency adds an important technical detail. The RGB channels determine the visible color, while the Alpha channel determines how much of that pixel is visible. A correct workflow therefore needs to reverse the color information without accidentally destroying the transparency information.
Photoshop gives experienced users detailed control, but it also requires more manual steps. For a faster workflow, a dedicated browser-based solution such as Image Inverter supports PNG processing alongside multiple image formats and batch operations.
The practical rule is simple: invert the colors, preserve the Alpha channel, and always verify the exported PNG against a different background before using it in a design or development project.